Tron2 Physical Deployment#
Deploy and run FluxVLA model inference on the Tron2 physical robot. This document describes how to perform FluxVLA deployment and inference on the Tron2 physical robot.
Tron2 Infra#
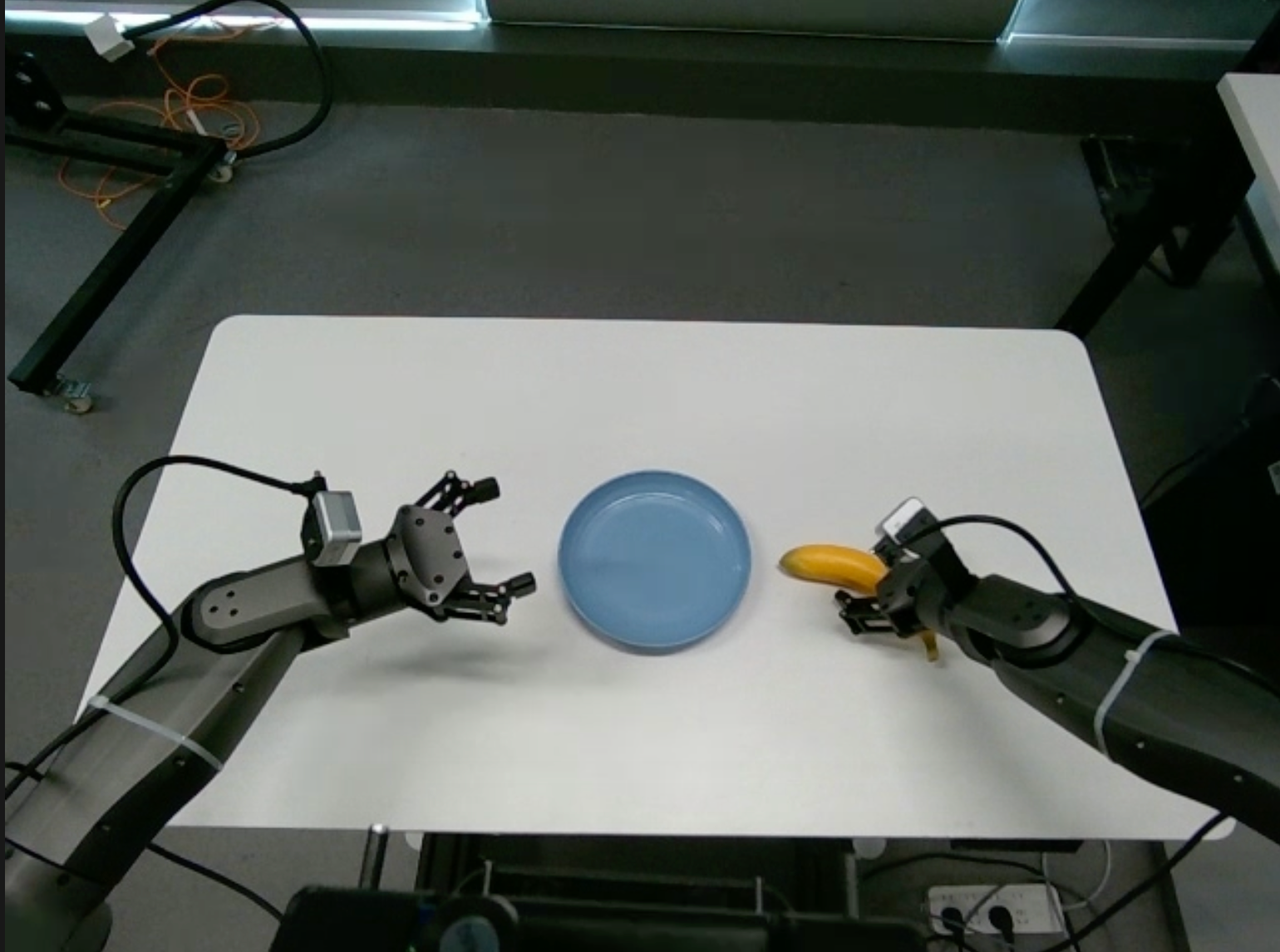
Scene Configuration and Recommendations#
Scene reference:
Head Camera Angle#
Tilt the head camera downward
mrostopic pub /move_cmd std_msgs/Float32MultiArray '{"layout":{"dim":[],"data_offset":0},"data":[2,3,1.0567,-0.0139998]}'
Table Height and Angle#
The stand should be separated from the table by approximately one and a half water bottle lengths. The table edge should form a perpendicular line with the robot stand.
The table height should be 75 cm.
Hardware Preparation#
Stand Fixation#
Tighten the four knobs so that they firmly press against the ground.
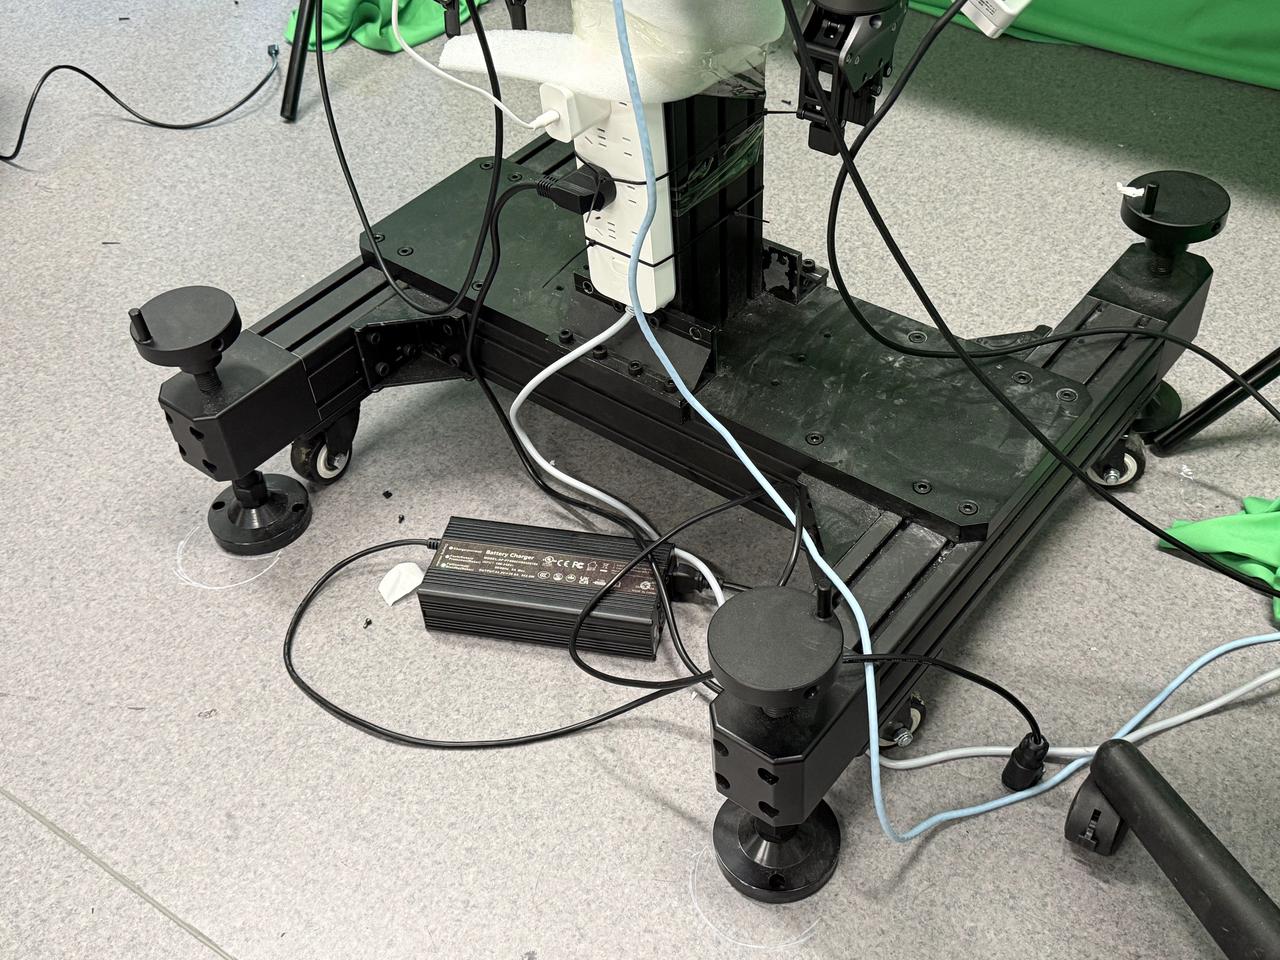
Cabling#
Connect the Ethernet cable to the network port. IP:
{TRON2_IP}All three cameras are connected to the local host via a 10 Gb/s expansion dock.
Physical Environment#
Inference Environment Requirements#
Install ROS1 following the official tutorial.
Use the Conda environment configured in the previous steps.
Install the motion control development library following the official TRON2 SDK development guide.
git clone https://github.com/limxdynamics/limxsdk-lowlevel.git
pip install limxsdk-lowlevel/python3/amd64/limxsdk-*-py3-none-any.whl
Install the RealSense SDK and the realsense-ros package:
https://github.com/IntelRealSense/librealsense/blob/master/doc/distribution_linux.md
https://github.com/rjwb1/realsense-ros
Install other dependencies:
pip install websocket-client
sudo apt install net-tools
Camera Node#
Connect all three cameras to the local host (not the robot’s onboard computer) and run directly. The system will automatically detect serial numbers.
Publishers (primarily used):
camer0/color/image_raw
camer1/color/image_raw
camer2/color/image_raw
Code:
python tron2_infra/
#!/bin/bash

#source /opt/ros/noetic/setup.bash
# source {ROS_WORKSPACE}/devel/setup.bash
# export ROS_IP={TRON2_ROS_IP}

# Function to detect connected RealSense cameras
detect_cameras() {
    # List all connected RealSense cameras, excluding Asic Serial Number
    serial_numbers=($(rs-enumerate-devices | grep "Serial Number" | grep -v "Asic" | awk '{print $NF}'))
    echo "${serial_numbers[@]}"
}

# Loop to check for the launch flag file and connected cameras
while true; do
    serial_numbers=($(detect_cameras))

    # Check if any cameras were found
    if [ ${#serial_numbers[@]} -gt 0 ]; then
        echo "Detected ${#serial_numbers[@]} cameras."
        break  # Exit the loop if cameras are detected
    else
        echo "No RealSense cameras detected. Retrying in 5 seconds..."
        sleep 5  # Wait for a while before retrying
    fi
done

# Automatically start a ROS node for each detected camera
if [ ${#serial_numbers[@]} -gt 0 ]; then
    for i in "${!serial_numbers[@]}"; do
        serial=${serial_numbers[$i]}
        echo "Starting ROS node for camera $serial..."
#        roslaunch realsense2_camera rs_camera.launch serial_no:=$serial camera:=camera$i enable_pointcloud:=True enable_accel:=True enable_gyro:=True enable_sync:=True unite_imu_method:=linear_interpolation &
        roslaunch realsense2_camera rs_camera.launch serial_no:=$serial camera:=camera$i align_depth:=True color_width:=640 color_height:=480 color_fps:=30 &
        sleep 10  # Optional: wait a bit before starting the next camera
    done

    # Wait for all background processes to finish
    wait
else
    echo "No cameras to start."
fi
Tips: The camera serial numbers are determined by the USB insertion order. Therefore, the camera topic names may not correspond to the correct camera streams every time. After each camera node launch, use rqt_image_view to verify the mapping. For further issues, please contact the company’s product and software teams.
State Node#
Create a state node to subscribe to the robot state in real time.
Publishers:
/joint_states/left_arm
/joint_states/right_arm
/joint_states/head
python tron2_infra/tron2_state_rostopic.py
Control Node#
Provides servoJ / moveJ interfaces for continuous control or single-point position control.
Specify the robot accid to ensure the robot model corresponds to the designated accid.
python tron2_infra/tron2_control_rostopic.py
Head Control#
Tilt the Tron2 head gimbal downward:
ssh {USER}@{TRON2_IP}
After logging in, enter:
mrostopic pub /move_cmd std_msgs/Float32MultiArray '{"layout":{"dim":[],"data_offset":0},"data":[2,3,1.0567,-0.0139998]}'
Hardware Troubleshooting#
If the camera node terminal displays “the frames didn’t arrive in 5 seconds”, unplug and reconnect all three camera USB cables.
Each time the camera node is restarted, also restart the state and control nodes to prevent communication loss.
After a successful camera node launch, continuous inference can be performed without disconnection.
FluxVLA Inference#
Environment Preparation#
Cuda 12.4:
Source: https://developer.nvidia.com/cuda-12-4-0-download-archive
Select the runfile for download.
[Image]
wget https://developer.download.nvidia.com/compute/cuda/12.4.0/local_installers/cuda_12.4.0_550.54.14_linux.run
sudo sh cuda_12.4.0_550.54.14_linux.run
LimVLA Environment Configuration
Install pytorch:
pip install torch==2.6.0 torchvision==0.21.0 torchaudio==2.6.0 --index-url https://download.pytorch.org/whl/cu124
Install LIBERO:
git clone https://github.com/Lifelong-Robot-Learning/LIBERO
cd LIBERO
pip install -r requirements.txt
pip install -e .
Due to PyTorch version changes, LIBERO may require some accommodations; in particular, the way we use torch.load might need to be updated.
Install transformers:
pip install transformers==4.53.2
Install flash-attention
git clone https://github.com/Dao-AILab/flash-attention.git
cd flash-attention
git checkout v2.5.5
MAX_JOBS=4 python setup.py install
Install dlimp
git clone https://github.com/kvablack/dlimp
cd dlimp
pip install -e .
Install limvla
pip install -r requirements.txt
python -m pip install -e . --no-build-isolation
This ensures that modifications to the limvla package are reflected in real time without the need for repeated installations.
Tron2 Startup#
First switch the robot to idle mode, then switch to developer mode.
Launch the camera node, state node, and control node.
Prepare for inference.
launch.json#
Copy the following content into launch.json for convenient debugging with the Python debugger.
{
    "name": "Inference Pi05",
    "type": "debugpy",
    "request": "launch",
    "program": "{CONDA_ENV_PATH}/bin/torchrun",
    "python": "{CONDA_ENV_PATH}/bin/python",
    "args": [
        "scripts/inference_real_robot.py",
        "--config", "{PROJECT_PATH}/configs/pi05/pi05_paligemma_tron2_pick_bananas_full_finetune.py",
        "--ckpt-path", "{CHECKPOINT_PATH}/checkpoints/step-001000-epoch-00-loss=0.0072.pt",
    ],
    "console": "integratedTerminal",
    "justMyCode": false,
    "env": {
        "CUDA_VISIBLE_DEVICES": "0",
        "HF_ENDPOINT": "https://hf-mirror.com",
        "WANDB_MODE": "disabled",
    }
}
Usage Instructions#
Press “0” to reset, and press “1” to run inference with the corresponding prompt. Multi-prompt input is also supported.
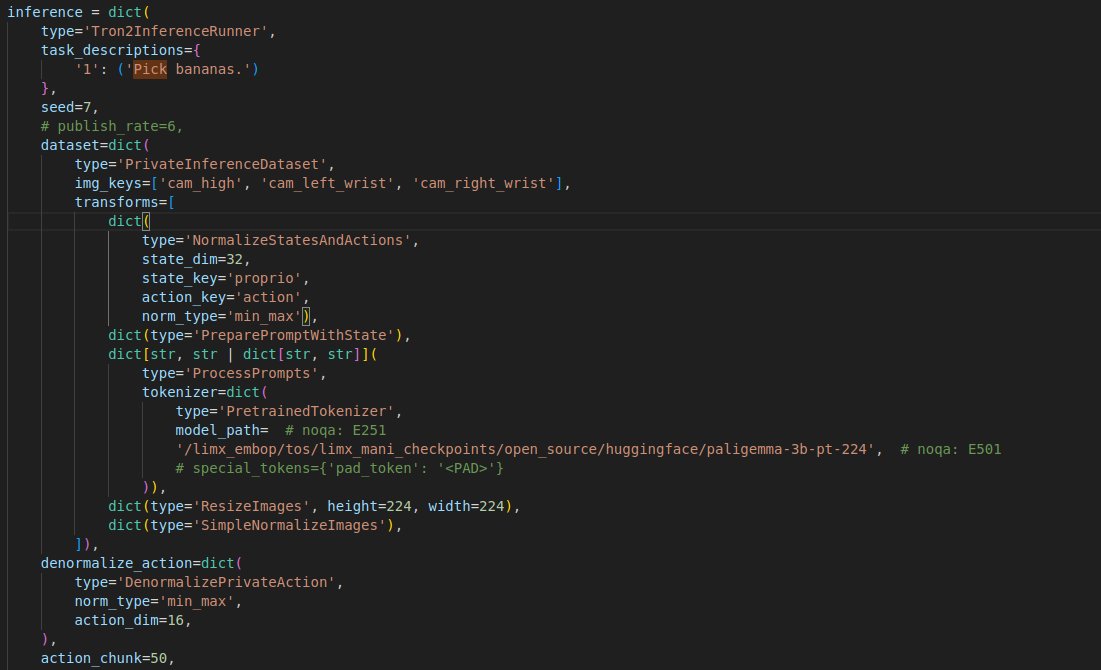
The prompts are specified in the config under inference/task_descriptions.
Currently, all operations use moveJ control with an execution time of 1–4 seconds (configurable in the state node).
The publish_rate is specified under inference/publish_rate in the config. It is recommended to start with a lower rate to facilitate trajectory visualization.
Workflow:#
Push the table forward and perform an arm reset first (to the table surface level).
Then launch the model inference. During the process, the moveJ time in the state node can be adjusted to modify the control frequency.
After inference is complete, retract the table and use the joystick to switch to idle mode.